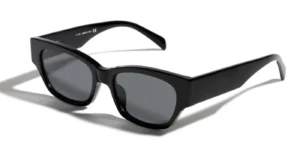
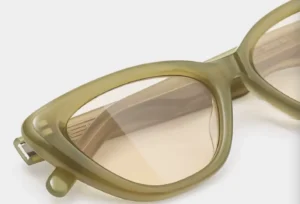
Providing high-quality standards for eyeglass frames requires sunglasses manufacturers to stick to strict processes and quality standards at every step of production. The factory must execute complete sunglass quality standards and processes to ensure that the frames meet optical, functional, and aesthetic needs.
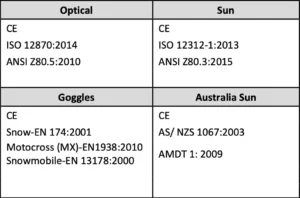
Eyeglass production and testing standards serve as the basis for quality inspection and check of raw materials, semi-finished products, and finished products in the eyewear manufacturing process. Custom Sunglasses Manufacturers should stick to industry guidelines and relevant national quality standards.
This includes not only producing and selling products that are safe, corrosion-resistant, and anti-corrosive, but also providing eyewear products that are safe, harmless, durable, and reliable.
In this article, we outline the key quality control techniques used by quality control technicians to ensure excellence in eyeglass quality standards.
1. The most direct check of eyeglass frame quality standards by consumers
Appearance quality: Consumers can assess the quality of eyeglass frames by visually observing their appearance. They will notice if there are any noticeable defects, scratches, dents, or spots on the surface.
Material quality: Consumers can judge the quality of eyeglass frames by touching and feeling the materials. High-quality frames are typically made of durable and comfortable materials, such as high-grade metal alloys or premium plastics.
Elasticity and stability: Consumers can try adjusting and bending the eyeglass frames to evaluate their elasticity and stability. Quality frames should have moderate elasticity, able to recover to their original shape, and securely fit on the face.
Eyeglass parts quality: Consumers can inspect the accessories on the frames, such as nose pads and temple tips, to assess their quality. Accessories should be firm, stable, and able to accommodate different face shapes and sizes.
Aesthetic requirements: Consumers’ aesthetic preferences for eyeglass frames are also an important factor in judging quality. They pay attention to whether the frame’s design, color, and overall appearance align with their preferences and needs.
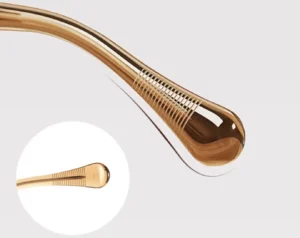
By observing and evaluating these aspects, consumers can make direct judgments about the quality of eyeglass frames and make corresponding choices and decisions.
2. Quality testing of eyeglass raw materials
Material identification: Testing to ensure materials meet required specifications.
Physical performance testing: Assessing hardness, strength, and toughness for durability and stability.
Chemical composition analysis: Checking for compliance with standards and the absence of harmful substances.
Optical performance testing: Evaluating transparency, refractive index, and dispersion for optical requirements.
Surface quality inspection: Examining for scratches, contamination, and defects.
Durability testing: Simulating real-world conditions to assess lifespan and stability.
By conducting comprehensive quality testing, eyewear manufacturers ensure materials meet standards and produce high-quality glasses.
3. Semi-finished and finished glasses quality inspection
During the manufacturing process of eyeglass frames, both in the semi-finished and finished stages, they undergo rigorous inspections:
Dimension: Key dimensions are verified using calipers or measuring devices to ensure they fall within tolerance limits.
Structure: Testing for twisting, bending, and drop resistance is conducted to check the integrity of the frames.
Functionality: Testing endurance of hinges, stress points of key components, and movable parts.
Coating: Adhesion testing is performed to ensure scratch resistance and durability.
Markings: Inspecting the position and clarity of etchings, engravings, and logos.
Every batch of products must undergo documented inspections and process reviews. We reject any frames that fail to meet our stringent standards.
4. Quality standards for eyeglass frame
(1) Eyeglass Eye-rim Shape and Size Quality Standards
(a). Use a ruler to measure the Eye-Rim positions A and B, the bridge size (DBL), and the length temple (the distance from the screw center to the end-tip) should meet the order sheet and drawings, with an allowance of ±0.2mm for the eye-rim positions A and B, 0.3mm for DBL, and ±2mm for the length temple; and You can study ISO standards carefully
(b). Install the eye pattern and use a straightedge/ruler to measure that it must be leveled in a straight line, without drooping, and the cutting line is consistent with the eye pattern baseline;
(c). The curvature of the front and the distance between the bridge meet the requirements of the production order and technical drawings. The front has no pre/post upper/lower distortion, deformations (especially at welding positions such as rim-lock and bridge), or distortions;

(d). The front and groove must ensure the accuracy of size, and the effect after bending, and all external sizes meet the requirements of the technical drawings;
(e). There should be no welding slag at the welding positions of the rim-lock, and it must be smooth without deformations;
(f). Check whether the fitting of the groove and lens match, and whether there is color peeling off scrapes, or lens popped out of the frames.
(2). Eyeglass Rim Lock’s Quality Standards
(a). Install the eye pattern, the midline of the rim-lock position matches the cutting position of the eye rim, meeting the requirements of technical drawings and eye pattern;
(b). Use a parallel straightedge to measure that the welding of the rim-lock position is parallel to the horizontal axis, with consistent height as the technical drawings and eye pattern, without height difference or drooping;
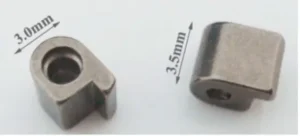
(c). By visual inspection from above, the rim lock position must follow the curvature of the front;
(d). The screw of the clamping position must be tightened properly, with the correct cutting method and proportion;
(e). The allowance for the rim-lock position is ±0.2mm, and the crack allowance for the rim lock is +0.2mm;
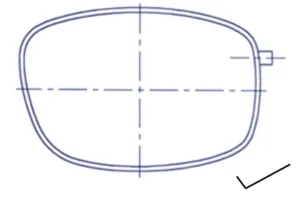
(f). The R position of the rim lock position matches the eye rim without exposure or insertion, with appropriate welding material, and uniform welding without heap, without wonders such as breaks, defects, or vacuous welding.
(3). Eyeglass Bridge and Top-bar Quality Standards
(a). Install the eye pattern and use a parallel straightedge/ruler to check that the bridge/top bar is parallel to the horizontal axis and its position meets the technical drawing needs;
(b). Check that the R position of the bridge/top bar shape is centered without deformation or scrape and that the external size data meets the needs of the technical drawings;
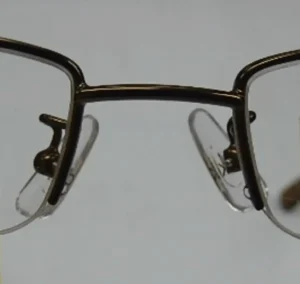
(c). The welding R position matches the eye rim without exposure or insertion, with appropriate welding material, uniform welding without heap, without wonders such as break, defects, or vacuous welding;
(d). The bending fitting of parts must match smoothly.
(4). Eyeglass End-pieces Quality Standards
(a). Use a ruler/parallel straightedge to measure that the positioning of the End pieces is parallel and balanced without drooping or height difference and that the external size matches the technical drawings;
(b). The R surface of the end pieces matches the eye rim without protruding or entering the front, with right welding material, uniform welding without a heap, without a break, defects, or vacuous welding;

(c). The bending position of the temple, angle, R, front inclination angle, and closing position of the temples meet the needs of the technical drawings;
(d). When viewed from above, the end pieces must curve smoothly with the front;
(e). The allowance for the position of the end pieces is ±0.2mm, and the inclination angle allowance is ±1 degree.
(5). Eyeglass Pad Arm Quality Standards
(a). Install the eye pattern and use a parallel straightedge/ruler to check that the height and position of the nose pad arm welding meet the needs of the technical drawings;
(b). The nose pad arm welding line follows the curvature of the Eye-rim without protruding or entering the front, with right welding material, uniform welding without heap, without phenomena such as break, defects, or vacuous welding;

(c). Check that the angle of the nose pad is correct and balanced without differences in height;
(d). When viewed from the whole frame stand above, check that the height of the nose pad is symmetrical and correct.
(6). Eyeglass Temple and Tips Quality Standards
(a). Use a ruler to measure the temple length meeting the needs of the technical drawings and order sheet, with all external sizes following the drawings;
(b). The welding material is suitable at the welding positions, with uniform welding without heap, without phenomena such as break, defects, or vacuous welding;
(c). The selection of acetate temple tips’ glue is suitable, the temple tips are not easily loosened, without obvious gaps;

(d). The Core Wire has no gold explosions, the Core Wire is centered, with no wrinkles, shrinkage, scruff marks or gaps/ cracks at the joint positions, or swelling phenomena, and the Core Wire and temple tips have no stains;
(e). The bending radius, length, and angle of the acetate temple tips meet the needs of the technical drawings;
(f). The temples and metal bars and left and right temple tips have no color differences;
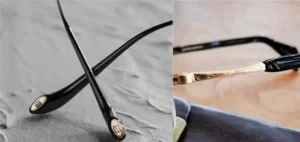
(g). There should be no scratches at the connecting positions, and temple tips 0.2~0.3mm larger than the metal parts are allowable;
(h). The assembly of the metal logo must meet the strict needs of the technical drawings and order sheets;
(i)The patterns and all external sizes of the temple follow the needs of the technical drawings.
(7). Eyeglass Lenses Quality Standards
(a). The lens size is correct and matches the curvature of the frame, without exposed edges, with curvature consistent with the frame, and no popping-out phenomena of the lenses;
(b). The cutting method of the lens edges must be correct and smooth, without phenomena such as cat whiskers or cracks;
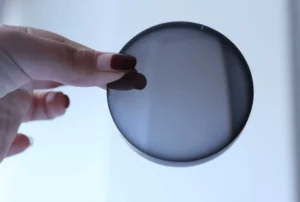
(c). The printing and logo on the lens meet the needs of the technical drawings and order sheets;
(d). Place the sunglasses frame under white light/paper, and check at a 100mm viewing distance that the colors of the left and right lenses are symmetrical, without light and dark colors (for polarized lenses, the polarization line is parallel and symmetrical between the left and right sides);
(e). The surface of the lens has no stains, scratches, or impurities;
(8). Eyeglass Hinge and Temple Quality standards
(a). The hinge cannot be too loose or too tight, and the spring hinge moves smoothly, applying light finger pressure to open and close the temple, the hinge operation is smooth with no sound or interference, and the hinge screw does not rotate when moving the temple;
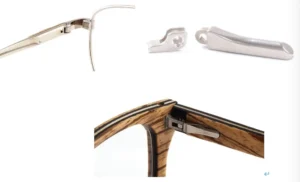
(b). After opening the temple (normal hinge), the temple can be moved to any position (angle) and will not fall down automatically. No changes after opening;
(c). The angles of the left and right temples must be uniform and symmetrical when opening;
(d). Please pay special attention to the selection of the angle hinge to ensure the temple does not contact the lens.
(9). The quality standard of glasses frames screw
(a). The screw surface has no scratches or burrs;
(b). The screw can loosen and tighten easily/should be able to loosen by flipping;

(c). The screw specification is correct and the color is symmetrical between left and right.
(d). Self-locking screws must be used for normal hinge screws to prevent loosening.
(10). The eyeglass frame quality standard of plating and coating
(a). Check the order sheets and original color samples, the code is correct, the position is correct, and the boundary between different colors is clear, without boundary issues;
(b). There is no difference in tone, no bubbles, stains, raises, fiber-like textures, turbid spots, cracks, scratches, etc.;
(c). Strong adhesion, no discoloration, no fading and peeling off.
(11). Adjust the quality standard of glasses frames
Check of the eyeglass frame: (The external shapes of all parts meet the needs of technical drawings and order sheets). “Flat and stable as well as symmetrical”
(a). Verify the inclination angle, temple curvature (radius, inner deviation angle), temple opening size, the closing position of the temples, nose pad arm position, height differences of pads, and positions of each component;
(b). 4 flat aspects: front, bridge, nose pad, and end piece;
(c). 2 stable aspects: Stable when placed upright and upside down;
(d). 4 symmetrical aspects: temple Opening, the closing position of the temples, the curvature of the temple, and inclination angles are symmetrical;
(e). 3-point distances: tips position of the temple, position at the curvature of the temple, and total width meet the production order and technical drawing needs.
(12). Customer-specific eyeglass frame information
(a). The content, patterns, font size, font, and character spacing of the customer data imprinting/printing/laser engraving/branding meet the needs of the technical drawings and printing order sheets;
(b). The printing has no peeling and must be neat, clear, perfect, and correct, without oil stains or color rubbing phenomena;
(c). Name cards/stickers/hang tags shall not be arbitrarily modified, and must be clear, neat, and correct, meeting the technical drawing and printing form requirements;
(d). The assembly or welding effect of nameplates/decorations (diamonds/pearls etc.) has no scratches and is securely positioned correctly, with special attention to enamel glue control.
Special Attention to Printing, Size, Color, Centerline, Frame Adjust Construction (Temple Opening, Pantoscopic Angle, Front Bends, Temple Curves), Parts Specifications (Dimensions), Welding Positions, Surface Treatment, Overall Appearance, Structural Testing, etc.
Conclusion
By adhering to these Quality Standards for Eyeglass Frames, eyeglass manufacturers can produce eyeglass frames that are reliable, safe, and meet the functional and aesthetic needs of consumers.
This guide will also help you if you are preparing to design your own eyewear and create your own eyewear brand, or if you are looking for the right eyewear manufacturer.
