Introduction
Getting the perfect fit for your glasses is important for optimal vision and comfort. However, glasses can become misaligned or loose over time, making adjustments necessary. Whether your frames are sitting crooked, are loose on your nose, or have arms that slip behind your ears, there are many tricks to easily adjust your glasses at home.

How to Adjust Glasses? The sunglasses manufacturers make this comprehensive guide covering step-by-step instructions for making all types of eyeglasses and sunglasses adjustments and repairs. You’ll learn how to tighten loose nose pads, reshape frames to better fit your face, replace nose and ear pads, tighten loose screws, bend metal arms, adjust plastic frames, and more. With just a few basic tools and supplies, you can customize the fit of your eyewear for enhanced vision performance and wearing comfort.
Chapter 1 – How to Adjust Nose Pads on Glasses
Loose nose pads are a common annoyance that can cause glasses to slide down your nose. Here’s how to tighten them:
Materials Needed:
- Small screwdriver
- Needle nose pliers (optional)
Instructions:
- Remove nose pads – Unscrew any screws to detach the pads from the frames.
- Squeeze pad arms – Use pliers to gently pinch the pad arms closer together to tighten the space between pads.
- Test fit – Try frames on periodically to ensure pads squeeze the nose firmly but comfortably.
- Replace pads – Screw tightened pads back onto the frames.
With nose pads properly adjusted, your glasses should grip your nose firmly again.
Chapter 2 – How to Adjust Plastic Frames Slipping Down
Gravity can cause plastic eyeglass frames to gradually slide down your nose over time. Try these solutions:
Bend the Bridge
- Gently bend the plastic bridge area inward with your fingers to create a more pinched profile that grips your nose better.
Heat and Pinched
- Use a hair dryer to warm the plastic bridge, then press inward with your fingers before cooling under cold water to set the shape.
Adjust or Replace Nose Pads
- Install adjustable rubber nose pads and pinch them together or replace them with grippier versions.
Chapter 3 – How to Adjust Metal Eyeglass Frames
Methods for adjusting metal frame fit include:
Bend the Bridge
- Run glasses under warm water then use needle nose pliers wrapped in a cloth to bend the metal bridge inward to grip the nose better.
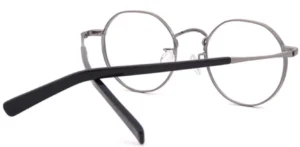
Bend Earpieces
- Heat earpieces with a hair dryer, then bend ends gently inward 10-15 degrees to tighten temple grip.
Resize Nose Pads
- Use pliers to pinch metal nose pad arms inward to reduce space between pads for a tighter fit.
Chapter 4 – How to Adjust Glasses that Are Too Loose
Try these tricks to tighten overall loose frames:
Wrap Temple Tips
- Add foam, tape, or rubber tubing to the ends for a thicker grip.
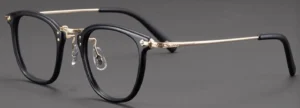
Tighten Screws
- Re-tighten any loose frame screws, or replace stripped screws using thread locker gel for adherence.
Bend and Reshape
- Carefully bend frames at pressure points to contour the face better.
Strengthen Hinges
- Compress movable joints inward with pliers to the desired tension.
Chapter 5 – How to Adjust Glasses Arms
Do your eyeglass arms hurt, poke out, or slip? Use these techniques:
Bend Angle
- Reshape plastic arms by heating and re-angling ends to sit flush behind ears.
Shorten Arms
- For arms that are too long, trim plastic or metal pieces with clippers for a better fit.
Rotate Hinges
- Gently heat plastic temples then twist to adjust angle.
Reposition Arms
- Earpieces should align perpendicular to ear canals, with earlobes exposed.
Chapter 6 – How to Adjust Glasses That Are Too Tight
If your glasses pinch or put too much pressure on your nose or head, try these loosening techniques:
Widen Bridge
- For plastic frames, apply heat then gently bend the bridge area outward to relieve pressure on the nose.
Stretch Frames Wider
- Pull plastic earpieces outward then cool with cold water to retain shape. This reduces grip tension.
Enlarge Nose Pads
- Replace small pads with larger-sized pads to distribute weight over more skin area.
Bend Earpieces Outward
- Reshape earpieces so they angle slightly away from your head instead of digging in.
Chapter 7 – How to Adjust Kids’ Glasses
Kids’ frames require even more frequent alignment. Try these kid-friendly tactics:
Use Comfy Materials
- Choose extra soft silicone or rubber nose pads and temple tips.
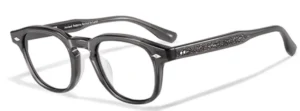
Loosen Fit
- Pad arms can be left slightly looser to avoid irritation.
Reduce Arm Length
- Trimming earpiece length prevents poking.
Retime Hinges
- Ensure hinges snap tightly closed but aren’t too stiff for little hands.
Check Fit Regularly
- As kids grow, monitor fit and realign parts like nose pads often.
Chapter 8 – How to Adjust Glasses with Nose Pads
Nose pads play a crucial role in proper fit. To optimize:
- Pinch pad arms inward to increase grip on the nose bridge.
- For excess slippage, move pads closer together to reduce space between them.
- If the bridge feels too loose, close the pad arm angle more.
- For plastic pads, gently bend built-in pinching mechanisms inward for a tighter grip.
- Replace worn pads with grippy new silicone or rubber versions.
Chapter 9 – How to Adjust Plastic Frames
Plastic eyeglasses require occasional realignment as they wear:
Tighten Bridge
- For plastic frames sliding down the nose, pinch the bridge inward while heated then cool to set shape.
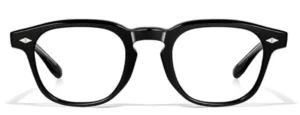
Bend and Reshape
- With mild heat, carefully flex frames at ears, nose, and temples to customize contouring.
Twist Hinges
- Gently heat plastic hinge pieces with a hair dryer then twist to adjust the angle.
Clip Temples
- For earpieces poking out too far, clip off end sections in small increments for better positioning.
Chapter 10 – How to Adjust Metal Frame Parts
Techniques for realigning metal glasses components include:
Bridge Plybending
- Under warm water, use padded pliers to bend the bridge in/out for ideal nose contouring.
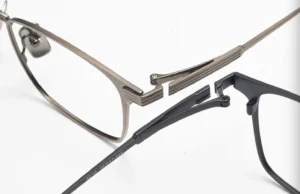
Earpiece Bending
- Run metal earpieces under warm water then use pliers to gently bend ends inward/outward as needed.
Nose Pad Pinching
- With pliers, pinch pad arms inward/outward to customize space between pads according to your nose width.
Hinge Tightening
- If joints are too loose, compress metal hinge components inward for desired tension.
Chapter 11 – How to Adjust Frames Without Nose Pads
Frames lacking built-in nose pads require extra care:
Add Grip Tape
- Apply removable silicone tape strips to the nose bridge area for enhanced friction.
Attach Adhesive Pads
- Stick small gel pads onto the nose area to prevent slippage.
Tighten Bridge
- For plastic frames, heat then pinch the bridge inward to improve grip on your nose.
Bend Earpieces
- Angling earpieces slightly inward enhances grip and stability.
Chapter 12 – How to Adjust New Glasses for Comfort
It takes practice to get used to new glasses. To ease the transition:
- Start by wearing them at home to adjust vision before venturing out.
- Carry adjustment tools and regularly tweak fit as needed in the first weeks.
- Gradually build up wear time as discomfort dissipates to acclimate.
- Keep wearing old glasses as backups until fully adjusted.
- Remain patient – it can take 1-2 weeks for your nose and ears to adjust to new pressure points.
With a little time and minor tweaks, your new glasses will start feeling naturally tailored to your face!
Chapter 13 – How to Adjust Glasses at Home
DIY glasses adjustment is straightforward with a few key supplies:
Materials Needed:
- Small screwdriver
- Eyeglass adjustment pliers
- Fine grit sandpaper (for metal frames)
- Threadlocker gel
- Heat sources like a hairdryer or pan of hot water
- Small flashlight or magnifying glass
- Eyeglass repair kit with replacement parts
Tips:
- Work over a soft surface to avoid damage if the glasses slip.
- Make adjustments gradually and check the fit often.
- Focus on the exact areas causing discomfort.
- Be extra gentle with plastic frames and parts.
Chapter 14 – How to Adjust Old Eyeglasses
With age, glasses frames and parts can warp or get knocked out of alignment. But old glasses are still fixable:
- Inspect frames closely under magnification to spot loose/damaged spots. Look for stripped screws, cracked plastic, and bent metal points.
- Clean frames thoroughly before adjusting to remove dirt and oils preventing adjustments from sticking.
- Replace any missing or unusable nose pads, hinge pins, temple tips, screws, etc. Old glasses often need new parts.
- Carefully heat and reshape warped plastic sections like bridges or twisted temples.
- For loose metal pieces, use needle nose pliers to gently compress joints and tighten hinges. Be cautious not to over-squeeze.
- If the frame front is bent, fill a bowl or sink with hot water. Dip plastic frames or hold metal frames in the hot water briefly to re-soften materials for bending back into shape.
Chapter 15 – Troubleshooting Eyeglasses Slipping Down Nose
If your glasses keep sliding down, try these solutions:
Nose Pad Adjustments
- Pinch pad arms closer together to tighten grip on the nose bridge
- Replace worn pads with fresh sticky rubber or silicone pads
- Move adjustable pads closer together
Bridge Customization
- For plastic frames, gently bend the bridge area inward for a more pinched contour
- Attach self-adhesive pads to add friction
Earpiece Tweaks
- Angling earpieces slightly inward enhances frame grip and stability
- Bend tips inward 10-15 degrees to create stronger lever pressure
Chapter 16 – How to Stop Glasses From Hurting Behind Ears
Do your eyeglasses irritate the skin behind your ears? Try these comfort fixes:
- Bend earpieces slightly outward so they don’t press directly into the skin.
- Wrap soft foam or fabric around tips to prevent rubbing.
- Try oval-shaped rubber ear tip covers to reduce pinching pressure.
- Carefully trim earpiece length if arms are so long they push painfully against the back of ears.
- Adjust the angle of earpieces so they hook over ear ridges without digging into indentations.
- For plastic arms, apply heat then gently re-bend the angle at which earpieces join frames to direct pressure away from irritating skin spots.
Chapter 17 – How to Repair Loose Eyeglass Joints
Loose, wobbly joints affect vision and comfort. To fix:
- Remove earpieces and bridge then clean all joint parts thoroughly before reassembling.
- For plastic frames, apply mild controlled heat to soften joints, then cool while pressing parts firmly together to reset adhesion.
- For metal frames, use needle nose pliers to compress and tighten hinge and bridge joints.
- Replace any bent or damaged screws. Use thread locker gel on screws to prevent loosening.
- Add transparent nail polish or elastic bands between joints for temporary added friction.
- If joints still feel loose, frames may need replacement nose pads, bridges, or hinges installed.
Chapter 18 – How to Stop Eyeglass Arms From Hurting
Do your eyeglass arms pinch behind the ears or poke out? Try these tips:
- Identify and pad pressure points with moleskin or cloth medical tape.
- Reshape warped plastic arms by gently reheating and then bending to better contour the head.
- Stretch arms a few millimeters wider to relieve built-up tension on frames.
- Reduce arm length by trimming or replacing with shorter earpieces that don’t extend as far.
- Rotate hinges so the angle directs earpieces toward the back of the head rather than sticking out.
- For metal arms, carefully bend ends inward/outward incrementally until positioning feels natural.
Chapter 19 – How to Fix Broken Eyeglass Arms
If an eyeglass arm breaks or detaches, quick fixes include:
- For loose screw-on arms, use a small amount of clear nail polish or crazy glue around screw threads to adhere the arm tightly when re-attaching.
- If the plastic arm detaches completely, apply strong epoxy and realign until set.
- Insert a toothpick or paperclip splint into a broken plastic section and glue. Allow to dry completely.
- Metal arms can sometimes be re-soldered by a jeweler. Otherwise, new arms may be needed.
- As a temporary quick fix, wrap sturdy tape or string around broken arm ends to solidly reconnect.
- Rubber bands stretched between arms add tension to help keep broken glasses intact.
Chapter 20 – How to Fix Loose Lenses
Follow these steps to re-secure eyeglass lenses that detach from frames:
- Remove old glue residue from the lens perimeter and frame rim. Clean surfaces so fresh glue adheres well.
- Apply 1-2 drops of clear bonding glue like Loctite around the lens edge.
- Press the lens back into the frame, maintaining proper alignment and centering.
- Secure lenses tightly in place using lens holders or tape to squeeze the lens in until the glue sets fully, generally in 5-10 minutes. Don’t wiggle the lens.
- Once the glue is bonded, carefully remove any excess squeezed out around the edges with a toothpick.
Chapter 21 – How to Adjust Nose Pads for Kid’s Glasses
Keeping children’s eyeglasses properly aligned takes extra vigilance as kids play and grow. Try these nose pad fitting tips:
- Select soft flexible pads in silicone, rubber, or plastic that conform to the nose without irritating delicate skin.
- Watch for looseness as small noses don’t grip as strongly. Tighten pads frequently.
- For glasses slipping down, move pads closer together to lift and center the bridge on the nose better.
- Have kids remove glasses properly using both hands to minimize warping.
- Check fit often and re-shape plastic pads as needed for growing noses.
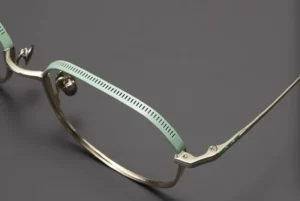
Well-fitted nose pads keep kids’ glasses comfortably in place!
Chapter 22 – How to Reshape Eyeglasses For Better Fit
For better vision and comfort, reshape frames to match your facial contours:
- Identify pressure points causing discomfort. Pad temporarily with tape.
- Gently bend and curve metal wires or plastic parts to relieve pressure points while maintaining proper positioning.
- Under a hair dryer’s heat, bend plastic earpieces and nose bridges to better fit your head shape.
- Stretch plastic frames wider if too much grip tension is pinching the nose or ears.
- For heavy frames, bend earpieces outward to shift weight balance closer to the ears.
Go slowly in small increments, reheating and testing frequently until frames feel naturally contoured.
Chapter 23 – How to Adjust Nose Pads for Plastic Frames
Plastic eyeglass nose pads loosen over time. To retighten:
- Remove pads by unscrewing any tiny screws and detaching them from the frame.
- On the underside look for a +/- indicator knob. Turn this a few clicks toward + to pinch pad arms tighter.
- Test fit pads repeatedly by reattaching them to the frame until the desired grip strength is achieved.
- If too loose, adjust the knob more. If too tight, rotate towards -.
- Replace worn pads for a fresh grip. Soft rubber repels oils keeping pads tacky.
Proper plastic pad adjustment prevents slippage while ensuring all-day comfort.
Chapter 24 – How to Adjust Fit for New Prescription Eyeglasses
Adapting to new prescription glasses requires time:
- Start wearing a new pair for brief periods at home to begin visual acclimation before venturing out.
- Carry tools like a small screwdriver and pliers to make fit tweaks on the go as you break in glasses.
- Expect an adjustment period of up to 2 weeks easing into improved vision and a new frame feel.
- Keep backups like previous glasses or contacts handy if you need a break during the transition.
- Ask your optician to demonstrate adjustment techniques specific to your new frames for the best customization.
With patience and incremental fit adjustments, new glasses soon start feeling like second nature
Chapter 25 – How to Tighten Loose Screws on Glasses
Follow these steps to re-secure any eyeglass screws that become loose over time:
- Identify all loose screws (typically nose pads, hinges, temples).
- Remove each using a precision eyeglass screwdriver.
- Clean screw threads and frame holes to remove any dirt or oils.
- Apply a small drop of non-permanent thread locker gel (blue Loctite) to each screw.
- Carefully tighten all screws back into place, being cautious not to strip.
The adhesive helps screws maintain a snug fit. Check tightness periodically and re-apply gel if needed.
Chapter 26 – How to Adjust Temple Tip Width for Glasses
Do your eyeglasses feel loose behind the ears? Widening temple tips help grip better.
For plastic tips:
- Wrap thin sections of double-sided tape around tips to increase diameter.
For rubber tips:
- Stretch wider rubber temple coverings over ends for added friction. Look for “Comotip” covers.
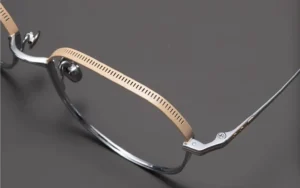
For metal tips:
- Wrap thin foam around tips to fatten width. Adhere with electrical or athletic tape.
Test different materials in gradual thicknesses until you find grippy yet comfy temple tips that eliminating slippage. Wider surfaces help distribute pressure and stabilize frames.
Chapter 27 – How to Adjust Rimless Eyeglass Frames
Rimless frames with wire earpieces and nose bridges have unique adjustment needs:
- To close the gap between lenses, gently squeeze the bridge together. Wrap rubber bands in an X to hold adjustment.
- For loose lens attachments, use an optical adhesive like Loctite to re-secure wire rims.
- For earpieces poking skin, wrap foam around ends to cushion.
- To reduce slipping, bend wires to curve closer to nose contours.
- For broken wires, use small amounts of clear nail polish to reconnect segments or adhere loose ends in new positions.
Handmade rimless frames require extra care but allow tweaking components like wires for custom fits.
Chapter 28 – How to Repair Loose Lenses in Glasses
Follow these steps to re-adhere eyeglass lenses that come unglued from frames:
- Remove old adhesive residue from the groove where the lens sits in the frame front.
- Select optical bonding glue like Loctite or Permabond that works on both plastic and metal frames. Avoid superglue.
- Place a tiny drop around the edges of the lens.
- Press the lens into the frame groove firmly for 30-60 seconds to set the adhesive.
- Use lens supports clipped on edges or tape across the lens to maintain tight pressure as the glue dries fully.
- Carefully trim any oozed-out adhesive. Let cure overnight before wearing.
Re-securing lenses properly maintain vision accuracy.
Chapter 29 – How to Adjust Sunglasses for Better Fit
Like eyeglasses, sunglasses can stretch and get bent out of shape over time. To improve fit:
- Carefully bend and angle earpieces to sit flush behind the ears.
- Stretch rigid plastic frames gently wider to relieve pressure.
- For loose nose pads, pinch pad arms inward to tighten bridge grip.
- If earpieces dig into the skin, wrap soft foam or tape around the ends to pad.
- Tighten any loose screws holding frames together. Use thread locker gel to secure.
- For plastic arms, apply controlled heat and re-bend areas causing discomfort.
- Align your head, eyebrows, and eyes straight when measuring proper contouring adjustments.
Chapter 30 – How to Stop Eyeglasses From Sliding Down Nose
If your glasses are constantly slipping down your nose, try these solutions:
Nose Pad Adjustments
- Pinch metal pad arms inward so there’s less space between pads.
- Stick soft rubber pads closer together to lift the bridge higher on your nose.
Bridge Customization
- For plastic frames, heat then pinch the bridge inward to increase grip.
- Attach small adhesive pads on the bridge interior to add friction.
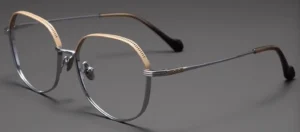
Temple Adjustments
- Angle earpieces slightly inward to leverage more pressure keeping frames up.
- Carefully bend ends inward 10-15 degrees to improve leverage security.
A combination of tactically squeezing and contouring key points keeps glasses locked in place.
Chapter 31 – How to Stop Eyeglasses From Pinching Nose
Plastic frames can eventually pinch painfully into the sides of your nose. To stop irritation:
- Identify pinch points. Pad temporarily with moleskin or tape.
- Widen frames by gently bending them outward to relieve nose pressure.
- Reform wider nose bridges and pad grooves using heat on plastic frames.
- Attach self-adhesive silicone pads inside frame edges to prevent digging in.
- Replace small nose pads with larger-sized pads distributing weight over more skin surface area.
- Try oval, round, or contoured pads shaped better for wide or narrow noses.
Avoid over-bending. Go slowly and gradually reshape frames until they rest comfortably without pinching nose skin or cartilage.
Chapter 32 – How to Fix Slipping Plastic Frames
To stop plastic eyeglass frames from sliding down your nose:
Bend and Reshape Bridge
- Soften the bridge area with a hairdryer or hot water then pinch inward for a more contour grip around the nose.
Add Pads for Friction
- Self-adhesive silicone or rubber pads act like grip tape inside frame edges.
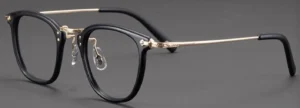
Adjust Nose Pads
- Pinch pad arms inward so there’s less space between. Or replace them with tackier pads.
Bend Earpieces
- Angling ends inward 10-15 degrees adding stabilizing tension.
Carefully tweaking multiple fit points in small increments keeps plastic frames firmly planted on your face.
Chapter 33 – How to Tighten a Loose Lens in Plastic Frames
Follow these steps to secure a plastic eyeglass lens that’s coming loose:
- Remove the lens completely and clean the channel edge and lens perimeter.
- Select a clear-drying optical epoxy like Loctite and apply a thin bead into the lens channel.
- Insert the lens straight back into place, aligning all edges flush within the frame channel.
- Use lens aligners or small pieces of tape across the lens to apply light-squeezing pressure as epoxy sets. This ensures a tight seal with no gaps.
- After curing overnight, trim any oozed-out glue residues with an X-Acto knife.
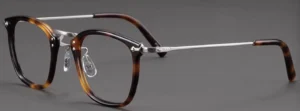
The repaired frame should now hold lenses securely again.
Chapter 34 – How to Repair Loose Lens Screws in Metal Frames
Follow these steps to fix loose lens screws in metal eyeglass frames:
- Identify all problematic loose screws and remove them using a precision jeweler’s screwdriver.
- Scrub screw holes and threads clean of dirt, debris, and old thread-locker gel.
- Apply new thread-locker gel (blue Loctite) onto screw threads.
- Insert each screw back into holes and tighten firmly but not excessively.
- Allow adhesive 10-15 minutes to set fully before wearing frames.
The thread locker will help screws maintain tightness even with repeated long-term wear and flexing.
Chapter 35 – How to Adjust Children’s Glasses for Better Fit
Kids glasses need frequent alignment and adjustment:
- Select soft flexible nose pads and temple tips that don’t irritate skin.
- Loosen pads and frame tension for comfort but still maintain stability.
- Frequently check hinge screws and tighten if loosening. Use thread locker gel.
- Monitor growth milestones and resize parts like nose pads as needed.
- Teach kids to always remove glasses with both hands to minimize warping.
- Heat metal or plastic components and re-bend gently to maintain proper shaping if frames get knocked askew.
Proactive adjustments keep kids’ eyewear fitting perfectly as little ones play and grow.
Chapter 36 – DIY Adjustments for Titanium Eyeglass Frames
Strong yet lightweight titanium frames have unique adjustment requirements:
- Reshape earpieces and bridge contours with gentle prolonged heating under hot water or a hairdryer, then slowly bend into proper shape. Avoid kinking.
- Titanium won’t fatigue from repeated bending so you can customize shapes incrementally until you achieve the perfect custom fit.
- Be cautious reshaping plastic-coated titanium frames. Only apply heat briefly to soften the plastic coatings that cover the titanium.
- For loose lens screws, remove any coatings in the screw hole area before using titanium-compatible thread locker gel to re-adhere screws tightly.
Titanium allows molding frames ergonomically to your facial contours for superior comfort.
Chapter 37 – Troubleshooting Eyeglasses Irritating Ears
If your eyeglasses rub, pinch, or irritate the skin around your ears:
- Identify precise irritation points, padding temporarily with moleskin. This prevents further damage as you tweak the fit.
- Carefully bend earpieces in these areas to direct pressure away from reddened skin.
- Reshape earpieces so they hook over ear ridges instead of digging into folds.
- Try oval-shaped rubber earpiece coverings to better distribute force.
- For longer ears, extend the earpiece length so glasses sit behind the ears without contact pressure.
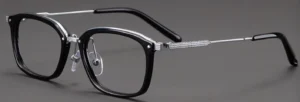
Solving discomfort often requires a combination of re-angling, padding, and reshaping the exact spots that chafe and irritate.
Chapter 38 – How to Repair Broken Eyeglass Frames
Before replacing damaged frames, see if they can be fixed:
- For cracked plastic, apply superglue or epoxy to the breakpoint and hold tightly until bonded. Use a temporary tape splint if needed for support.
- For detached plastic parts, roughen surfaces then bind back together with a strong epoxy. Allow to fully cure.
- For broken metal frames, attempt to resell disconnected sections after cleaning. Apply heat-activated adhesive if available.
- If arms detach, use nail polish or super glue to bond back in place permanently after cleaning mating surfaces.
- Rubber bands wrapped around temples act as temporary splints keeping arms attached but won’t last forever.
With careful gluing and splinting, broken frames may be salvageable for extended wear.
Chapter 39 – How to Adjust The Fit of Old Eyeglasses
As frames age, they can develop fit issues. To tweak vintage or used glasses:
- Carefully flex and reshape plastic components like bridges and temples using mild heat from a hairdryer or hot water.
- Replace any missing nose pads or earpieces with equivalents to restore frame stability. Match size and style as closely as possible.
- For metal frames, use padded pliers to gently reform wire shapes. Dip wires in hot water to soften first if needed.
- Be extra cautious about bending plastic-coated metal wires to avoid cracking aging coatings.
- Use thread locker gel when re-securing any loose screws to restore lasting grip.
With a delicate touch, old glasses can be freshened up for continued use.
Chapter 40 – How to Repair Eyeglasses with Missing Screws
Don’t discard frames missing small attachment screws. Replace using:
- Spare compatible screws from your eyeglass repair kit, matching threading and shaft length.
- Local hardware store offerings like miniature flat heads or Phillips metal fasteners if specialty replacements are unavailable.
- Clear nail polish or super glue to help adhere screws into stripped holes.
- Rubber O-rings fitted under screw heads for added tightening friction.
With screws reinstalled properly, frames regain structural integrity. Just take care not to over-tighten and crack plastic frames when replacing screws.
Chapter 41 – How to Adjust Eyeglasses That Don’t Sit Straight
If glasses look consistently crooked on your face:
- Check frame alignment on a flat surface. Are lenses positioned evenly or is the frame bent?
- With a felt tip pen, carefully make alignment marks at the pupil centers of each lens. This provides a guide for proper centering on your eyes as you adjust frames.
- Are earpieces symmetrical or different lengths throwing off balance? Replace or trim the longer arm.
- Does one nose pad sit higher? Are pads spaced evenly apart? Adjust any off-center pieces.
- Does head tilt or neck muscle tension pull frames to one side? Address any posture issues.
Methodically realign all elements until frames sit level again for proper vision and aesthetics.
Chapter 42 – How to Tighten Screws on Plastic Frames
Prevent loose screws from ruining plastic eyeglass frames:
- When re-inserting screws, rotate gently clockwise to avoid stripping plastic holes. Never force screws.
- For stripped holes, insert a toothpick coated in glue into the hole and break off protruding ends after drying. This fills the gap so screws re-tighten snugly.
- Apply a drop of clear nail polish to screw threads for additional holding power as you re-tighten.
- Inspect frame corners – are stress cracks developing around screw joints? This indicates overtightening.
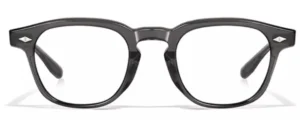
Go slowly and delicately when dealing with plastic frames to avoid irreparable damage from cracked holes or stripped threads.
Chapter 43 – How to Fix Uneven Glasses Arms
Does one eyeglass arm sit higher? This mismatch in positioning can distort vision. To realign:
Check ear placement. Arms should hook over the top ridge of ears evenly.
Gently bend the crooked arm end back down into proper horizontal alignment.
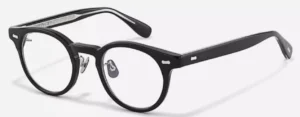
If one arm is shorter, replace it with a size match or temporarily pad the shorter arm’s end to build up thickness.
For plastic arms, apply heat then re-bend the angle at which arms attach to frames to correct uneven positioning.
For persistent unevenness, consult an optician – misaligned arms can signify the need for frame adjustment at the hinges.
Sunglasses rely on nose pads to avoid slipping. To re-secure loose pads:
- Remove any tiny screws, nuts, or pins attaching pad arms to sunglass frames.
- Clean screw holes and pad arm ends to remove dirt and oils before reassembly.
- Realign pads in the correct orientation, centered evenly over each nostril.
- Replace any damaged pad hardware like worn rubber cushions or broken springs/mechanisms.
- Re-insert screws with thread locker gel or nail polish for added adherence. Tighten snugly without over-compressing plastic frames.
- Test pad tightness and grip on your nose bridge. Adjust further if needed until the sunglasses are stable and comfortable.
Properly realigned nose pads prevent sunglasses from bouncing around while active.
Chapter 45 – How to Fix Broken Eyeglass Frames with Sugru
The adhesive putty Sugru provides an easy fix for cracked plastic eyeglass frames:
- Make sure any broken edges are aligned as desired. Clean area.
- Knead Sugru until pliable and press firmly into any cracks or breaks.
- Mold Sugru into its original shape using fingers and allow to fully cure overnight.
- Once hardened, sand excess residue flush for a smooth finish using fine grit sandpaper.
Sugru bonds are stronger than superglue on plastics. Just retain the original positioning while curing. Your repaired frames will be wearable once again!
Chapter 46 – How to Prevent Eyeglasses Fogging Up
Foggy lenses make seeing difficult. To reduce fogging:
- Clean lenses frequently with anti-fog spray or soap to prevent condensation buildup.
- Adjust frames so your eyes look slightly downward through the optical centers of lenses for optimum airflow.
- Ensure nose pads and bridges seal tightly against the nose to prevent warm exhaled breath from creeping up.
- Try frames with built-in foam barriers between nose cutouts and the lower edge of lenses to block moisture.
- Upgrade to lenses with hydrophobic or anti-fog coatings.
- In a pinch, rinse lenses with a drop of dish soap and gently wipe dry to prevent short-term fogging when going indoors.
Chapter 47 – How to Repair Eyeglass Arms with Sugru
The moldable adhesive putty Sugru offers an easy fix for broken plastic or rubberized eyeglass arms:
- Separate any fully detached arm pieces. Clean all bonding surfaces.
- Knead Sugru until pliable then press into gaps between arm parts, oozing into cracks.
- Clamp the arm in the desired position using tape or clamps. Allow Sugru to harden overnight.
- Once cured, cut away any excess dried Sugru. Sand rough areas.
With solid adhesion and shaping ability, Sugru permanently reattaches broken eyeglass arms or missing rubberized tips. Just bond cleanly along breaks.
Chapter 48 – How to Fix Nose Pads Loosening from Frames
Follow these steps to re-secure eyeglass nose pads that detach from frames:
- Remove any remaining pad hardware like screws, washers or pins.
- Scrub smooth frame holes and pad arm ends with alcohol to remove oils.
- Realign pads correctly on the frame bridge with even centering and spacing.
- If holes are stripped, fill gaps with glue then trim flush after drying.
- Apply a small drop of Loctite thread locker gel to hardware threads before re-inserting and tightening securely.
Reattached nose pads stay put when carefully glued and tightened into place. Avoid over-tightening delicate frames.
Chapter 49 – How to Adjust Eyeglass Arms that are Too Loose
Do your eyeglass earpieces slide off your ears? Try these tightening tips:
- Carefully rebend metal or plastic arms inward 10-15 degrees to increase grip.
- Replace worn rubberized earpiece tips with fresh sticky covers to improve friction.
- Wrap thin foam or medical tape around earpiece ends to fatten the diameter.
- Stretch existing rubber earpieces over wider tubing for a thicker fit.
- On plastic arms, spot heat then bend the angle back section attaching to frames inward to pull grips tighter.
Be conservative with tweaks and test fit frequently until arms regain just the right snugness without pinching. Proper pressure keeps glasses securely seated on your ears.
Chapter 50 – How to Reshape Eyeglass Frames
To reshape eyeglass frames for better-personalized fit:
- Identify areas causing discomfort due to excessive pressure. Pad temporarily to prevent skin irritation.
- With controlled heat from a hair dryer or hot water, carefully bend and flex plastic portions of frames until aligned with facial contours.
- For metal frames, gently bend problem portions while holding the frame in your ideal desired positioning.
- Make all adjustments gradually, reheating and testing fit frequently until frames feel naturally contoured to your face.
- Avoid over-bending which can damage the frame’s structural integrity.
With patience and small tweaks, reshaping distributes weight and pressure points for a custom-tailored eyeglass fit.
Chapter 51 – How to Repair Loose Eyeglass Bridges
If the bridge on your eyewear comes loose, use these steps to tighten:
Plastic Frames:
- Clean joins thoroughly then roughen with sandpaper for grip.
- Apply small drops of superglue or clear epoxy along the bridges and joints.
- Press parts together firmly for 30-60 seconds until bonded tightly.
Metal Frames:
- Scrub joint parts to remove dirt and corrosion.
- Use needle nose pliers to gently compress metal bridge pieces tighter together. Be careful not to bend.
- If needed, apply thread-locker gel before re-inserting screws for added adherence.
Proper cleaning and bonding re-secures wobbly eyeglass bridges for sturdy long-term wear.
Chapter 52 – How to Adjust Nose Pads for Single Vision and Bifocal Lenses
Fitting nose pads for multifocal lenses takes precision:
Single Vision
- Center nose pads evenly over pupils for ideal optics.
- Align pads parallel along the vertical optical center axis.
Bifocals
- Position the bottom of frames tuition lower on the nose to align the reading portion.
- Pad low on the bridge at bifocal height.
- May require custom optical realignment to position segments optimally.

Progressives
- Precisely match pad placement to customized progressive lens map for each prescription.
Careful nose pad placement optimizes viewing through all lens segments.
Chapter 53 – Troubleshooting Steps for Fixing Kids Broken Glasses
Follow these tips for repairing cracked or damaged children’s eyewear:
Broken Frames
- Strong epoxies like JB Weld bond plastic frames permanently. Clamp pieces tightly in place while drying.
- The dental orthodontic wire makes an ideal malleable splint for cracked frames.
- Sugru putty also works to bond cracks. Sand and shape excess once cured.
Detached Arms
- Reattach earpieces using nail polish or super glue with joints tightly compressed.
- Small zip ties act as temporary arm splints.
- Slide rubber o-rings onto ends for friction adding support.
With kid’s roughhousing, damage happens. But creatively splinting and gluing keeps glasses functioning.
Chapter 54 – How to Repair Eyeglasses with Toothpaste
Believe it or not, toothpaste offers a quick temporary fix for loose screws on eyeglasses:
- Remove problematic loose screw(s).
- Sprinkle toothpaste into the screw hole opening.
- Re-insert the screw, tightening snugly. The paste acts as a temporary adhesive.
While not a permanent solution, this can prolong glasses usability in a pinch until a more lasting fix is available. The mild abrasives in toothpaste provide a grip to stabilize the connection temporarily.
Chapter 55 – How to Measure Your Own PD for Glasses
Follow these steps to measure your own pupillary distance (PD) for accurate glasses fitting:
- Look straight into a mirror from an arm’s length distance. Remove glasses if needed.
- Use a ruler held vertically to mark the center of each pupil. Most are centered horizontally on the iris.
- Measure in millimeters between the two vertical pupil center marks. This is your PD.
- Repeat the steps holding a ruler against your face from the nose bridge and measuring outward horizontally to pupil centers.
- Take measurements 3-5 times for averaging since small movements can impact accuracy.
Knowing your PD ensures the best vision potential from meticulously centered glasses lenses.
Chapter 56 – How to Pad Eyeglass Earpieces for Comfort
Does wearing eyeglasses make your ears sore? Try these padding solutions:
Foam Tips – Self-adhesive foam covers wrap around earpieces to cushion pressure points.
Medical Tape – Apply soft cloth medical tape around irritation zones.
Molefoam – This self-adhesive padded tape sticks onto earpieces to protect fragile ear cartilage.
Tubing – Cushioning vinyl or rubber tubing slides over earpieces.
Earpiece Covers – Replace uncomfortable plastic earpieces with soft silicone, rubber or foam covers.
With minimal effort, padding prevents glasses from rubbing delicate ear skin raw. Find the padding shape and material that keeps your ears pain-free.
Chapter 57 – How to Repair Eyeglasses with Electrical Tape
Common household electrical tape offers a quick temporary solution for fixing loose or broken eyeglass parts in a pinch:
- Thoroughly clean and dry any affected areas like loose screws or cracked bridge joints.
- Wrap small sections of electrical tape around the damages – applying tightly enough to add structural support and friction.
- For cracked plastic frames, tape can act as an emergency splint to hold broken sections together until a permanent repair is made.
While not pretty, strong flexible electrical tape can buy you some extra time before properly repairing or replacing broken eyeglasses pieces. It sticks to both plastic and metal!
Chapter 58 – How to Repair Loose Eyeglass Joints
Methodically follow these steps to fix wobbly eyeglass hinges and joints:
- Identify all loose areas and remove any detachable parts like nose pads and arms.
- Thoroughly clean joint sections with alcohol to remove dirt, oils, and debris.
- Scrub any screw holes with cotton swabs to remove the old adhesive and expose the fresh surface.
- Apply a small drop of Loctite thread locker gel to all screws and pins before re-inserting firmly into cleaned holes.
- Compress joints gently but firmly together as you retighten hardware to increase friction. Avoid over-squeezing.
- Let adhesive fully cure for 10-15 minutes before wearing glasses.
Deft cleaning and gluing re-solidifies the integrity of loose eyeglass hardware.
Chapter 59 – How to Adjust Nose Pads on Plastic Frames
Plastic frames rely on properly aligned nose pads to avoid slipping. To optimize fit:
- Pads should be centered horizontally along the upper plastic frame bridge.
- Position pads directly above nostrils for even weight distribution.
- Adjust pad arms using built-in squeeze mechanisms until they grip the nose bridge firmly but comfortably.
- For excessive slippage, bend pads inward closer together to lift frames higher on your nose.
- Replace any missing, worn, or warped factory pads to restore grip.
Proper plastic nose pad adjustments keep frames stable all day long!
Chapter 60 – How to Resize Rubber Nose Pads on Glasses
Rubber nose pads loosen over time. Resizing steps include:
- Remove pads – unscrew or snap off from frames. Pry off if needed.
- Stretch pads – use pliers protected with a cloth to gently pull pads wider. Increase in 1mm increments.
- Test stretch – reinstall pads on frames. Check if the widened grip prevents slippage but isn’t too tight.
- Repeat – keep incrementally stretching pads until finding ideal tightness.
- Smooth edges – use an emery board to buff any rough edges after stretching.
Reshaping provides economical re-sizing for extended rubber nose pad usefulness.
Chapter 61 – How to Tighten Plastic Nose Pads on Glasses
Does wiggling your glasses make the plastic nose pads floppy? Restore tightness by:
- Removing pads and pinching metal retaining arms closer together so pads grip the bridge more firmly.
- For pad arms with adjustable tension knobs, turn knobs incrementally clockwise to increase pinching squeeze.
- If plastic pads are misaligned, reposition them evenly spaced across the bridge with equal pressure over the nostrils.
- Replace any warped, aged, or damaged factory pads to improve grip strength.
Properly realigned and tightened plastic nose pads keep glasses planted firmly on your face instead of bouncing with movements.
Chapter 62 – How to Stop Glasses Sliding Down Small Nose
If your narrow nose bridge makes glasses slide down, try these solutions:
- Pinch nose pad arms very close together to lift frames higher on your nose bridge. Minimal space between pads works best for thin noses.
- Use rubber pads with deep contours and grippy silicone material that hugs your nose shape. Avoid hard slippery plastics.
- For metal frames, carefully pinch pad arm angles inward so they compress inward rather than splaying outward.
- Attach small pieces of anti-slip material like silicone gel pads to the nose bridge for added friction.
- Adjust earpieces so they hook behind ears firmly to counteract downward slippage forces.
With tactical tweaks in both nose and ear domains, you can conquer slippage on even the most petite noses.
Chapter 63 – How to Repair Plastic Glasses with Super Glue
Super glue bonds plastic eyeglass parts in a snap. Steps include:
- Separate broken sections and clean bonding spots with alcohol to prep surfaces.
- Choose a cyanoacrylate superglue gel for easier control. Avoid “brush-on” thin versions that seep.
- Cover nearby areas with tape to avoid gluing fingers or making a mess.
- Apply a small drop and press parts firmly together for 30 seconds to set. Avoid moving while curing.
- The instant bond withstands flexing and wear. Sand or file excess glue for smoothness.
With proper alignment, super glue offers a fast way to repair plastic glasses until more permanent replacement options are available.
Chapter 64 – How to Adjust Nose Pads on Metal Frames
Properly fitting nose pads on metal frames comes down to precision bending:
- Remove nose pad arm screws using a jeweler’s screwdriver.
- Grip pad arms one at a time with needle nose pliers wrapped in cloth for protection.
- Slowly bend your arms inward or outward to adjust the angle and spacing between pads according to your nose width.
- Re-attach pads and test fit. Make micro adjustments until the ideal snugness is reached.
- Tighten or open the pad angle to lift frames higher or lower on your nose bridge as needed.
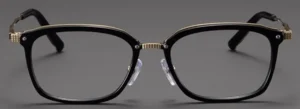
Carefully measured metal bending lets you customize pad spacing and angles for a slip-free sturdy grip.
Chapter 65 – How to Repair Eyeglasses with Floss
Believe it or not, ordinary floss can create an emergency eyeglass repair solution in a pinch:
For Cracked Frames
- Wrap floss tightly around cracked sections to bind them together until a better fix is available. Just be cautious of sharp edges.
For Detached Arms
- Floss also ties detached metal or plastic earpieces back onto frames temporarily.
For Loose Screws
- Wrap floss tightly around loose screws for added friction when tightening.
While not very durable, thin strong floss can add enough stability to broken eyeglasses to get you through a pinch until a more lasting DIY or professional repair is done.
Chapter 66 – How to Fix Nose Pads Pushing Into Nose
Are nose pads leaving dents on your nose bridge? Follow these readjustment tips:
- Ensure right/left pad spacing lines up centered under your nostrils. If lopsided, realign.
- Try oval or contoured pads that adapt better on narrow vs wide nose profiles.
- Replace hard plastic pads with softer silicone or rubber options that compress gently over your nose bone and cartilage rather than digging in.
- If existing pads tilt downward, use pliers to carefully re-angle pad arms so pads press flatter against nose contour.
- Still too much pressure? Carefully re-bend frames to sit higher on your nose profile.
Proper alignment and softer pads prevent glasses from denting your delicate nose tissues.
Chapter 67 – How to Fix Broken Glasses Leg
A broken or missing eyeglass earpiece arm renders frames unusable until fixed. For quick remedies:
- If the plastic arm detaches, use strong epoxy to bond back to its original position until hardened.
- For metal arms, electrical tape wrapped tightly creates a temporary wrap-around splint.
- Small binder clips clamped on can act as emergency arm replacements in a pinch.
- Run a string through screw holes and knot tightly across the head for DIY strap arms.
- Visit an optical shop to order exact replacement arms for your frames.
Jerry-rigged repairs allow temporarily wearing glasses again while waiting on proper professional replacements.
Chapter 68 – How to Fix Glasses Without Screwdriver
Lacking a proper tiny eyeglass screwdriver needn’t prevent DIY repairs:
- Flat plastic floss picks can grip screw slots in a pinch.
- Slim binder clip ends also fit into screw heads.
- A small crochet hook makes an improvised micro-screwdriver.
- For stripped screws, use super glue gel to fill holes and adhere screws in place semi-permanently.
- Rubber O-rings provide friction helping keep screws in stripped holes.
- Inventive options like a tilted thumbtack or even the metal end of an earring also work in very tight spots.
With creative poking, prodding, and prying, a determination can overcome lacking proper tools when fixing glasses at home.
Chapter 69 – How to Fix Temples on Glasses
Follow these steps to replace broken, bent, or otherwise faulty eyeglass temples:
- Use a screwdriver to remove any screws, pins, or nuts attaching the arm to frames. Detach the old temple.
- Select and fit a new replacement temple piece matched for frame style and measurements.
- Thoroughly clean attachment joint areas of any dirt, corrosion, or old adhesive.
- Apply a small amount of thread locker gel to arm screws/pins for added adherence before tightly refastening the new temple into frames.
- Adjust the bend angle and length of the new arm end to achieve proper positioning behind the ear.
With temples restored, glasses regain a secure fit on your head. Take care of gradually re-bending wire-cored plastic replacement arms.
Chapter 70 – How to Tighten Screws on Glasses Without Tools
Lacking proper mini screwdrivers needn’t prevent tightening loose eyeglass screws:
- Rubber bands wrapped around temple ends increase friction when turning screws by hand.
- Attach a small self-adhesive rubber cabinet bumper onto screw heads for grip.
- Use binder clips positioned so metal pinch ends fit into screw slots for turning.
- For stripped screws, skip tools and use clear nail polish or super glue as an improvised thread locker.
- Wedge folded paper or tape into grooves for temporary friction assist when tightening screws.
- Press a thumbtack firmly into slots at an angle for makeshift turning traction.
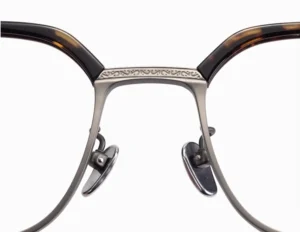
In a pinch, determined hands can creatively tighten glasses screws without proper jeweler’s tools.
Chapter 71 – How to Adjust Nose Pads on Plastic Sunglasses
To optimize fit, tailor plastic sunglass nose pads using:
- The adjustable tension knobs are built into pads – turn clockwise to increase pinch tightness.
- Needle nose pliers to pinch entire pad arms closer inward for added grip if needed.
- Selective pad replacement using the same style of wider, narrower, or softer pads for an improved fit.
- Strategic repositioning of sliding pads closer together to lift frames higher on a short nose bridge.
- Careful spot heating to bend frames at the bridge for a contour-hugging nose shape.

With incremental tweaks to tension, spacing, and materials, dial in the pad grip until sunglasses stay firmly and comfortably planted on your face.
Chapter 72 – How to Keep Glasses From Fogging Up
To reduce glasses fog buildup:
- Select lenses with hydrophobic, anti-fog, or oil-resistant coatings.
- Use dish soap to handwash lenses – reduces condensation-attracting oils.
- Position frames so your eyes peer slightly downward through lenses for airflow.
- Ensure nose pads seal tightly to prevent breath from creeping up from below.
- Wipe lenses thoroughly with microfiber cloth between wearings.
- Try adding small foam pads at nose cutouts to block moisture.
- Apply aftermarket anti-fog sprays and lens wipes. Reapply regularly.
With diligent lens cleaning and fit adjustments, you can minimize blurred annoying fogging.
Chapter 73 – How to Repair Loose Eyeglass Arms
Follow these steps to fix wobbly or detached eyeglasses arms:
- Remove arms and clean all joint parts thoroughly of old glue and debris.
- For metal frames, compress cleaned joints together tightly with needle nose pliers.
- For plastic frames, rough up contact areas with sandpaper and glue arms in place tightly using clear epoxy.
- Rubber O-rings stretched around joints increase friction.
- If hardware comes loose again quickly, old joints may be damaged. New replacement arms or professional help may be needed.
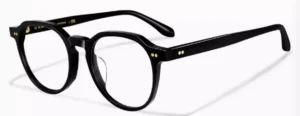
Methodical cleaning, gluing, and compressing can re-secure loose eyeglass arms temporarily.
Chapter 74 – How to Adjust Eyeglasses to Sit Straight
If your eyeglasses sit crooked on your face:
- Check if the lenses are centered correctly in frames. If not, get them reset by an optician.
- Examine frame alignment on a flat surface. If bent, carefully bend back into shape.
- Are nose pads spaced evenly and at the same height? If not, adjust the position.
- Make sure earpieces are in identical lengths. Shorten or build up any mismatch.
- Does one earpiece angle differ? Carefully rebend to match the other side.
- Use a mirror with glasses on and adjust frames until centered.
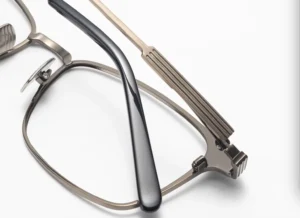
Taking the time to methodically adjust key points until frames sit level again is worth the effort for proper aesthetics and vision.
Chapter 75 – How to Tighten Loose Screws on Plastic Frames
Follow these steps to securely re-tighten any loose plastic eyeglass frame screws:
- Identify all problematic loose screws and remove them using a precision jeweler’s screwdriver, taking care not to strip.
- Clean screw holes thoroughly of all dirt and debris.
- Apply a drop of non-permanent thread locker gel (Loctite) to screw threads.
- Slowly re-insert screws into holes until tight, being extra cautious not to over-tighten and crack plastic frames.
- Allow adhesive 10-15 minutes to fully cure before wearing glasses.
The thread locker will help screws maintain tightness even with repeated flexing. Check screws periodically.
Chapter 76 – How to Adjust Eyeglasses for Proper Vision
To optimize your eyeglass prescription for clear comfortable vision:
- Frames should sit evenly and level on your face for proper optics.
- Lenses must be precisely centered based on your pupil distance measurements. Off-center lenses cause distortion.
- Nose pads should lift frames high enough for your eyes to gaze through the center “optical zone” of lenses without tilting your head.
- Adjust earpiece lengths so lenses sit at ideal distance from your eyes for your specific prescription strength.
- Ensure frames maximize the field of view without obstructing peripheral vision.
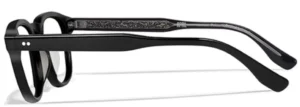
Take the time to carefully adjust fit and placement until your custom prescription lenses can work at peak visual performance.
Chapter 77 – How to Strengthen Eyeglasses Nose Bridge
To tighten a wobbly loose eyeglasses nose bridge:
Plastic Frames
- Spot heat bridge with hair dryer then pinch area inward for tighter fit while cooling.
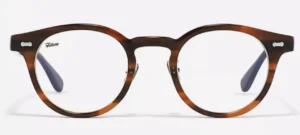
Metal Frames
- Under warm water, use needle nose pliers wrapped in cloth to squeeze bridge pieces together.
Reattach Loose Pads
- Clean the glue-detached pads back onto the bridge using clear epoxy or thread locker gel applied to the hardware.
Add Supportive Tape
- Temporarily add thin doubled-sided tape strips inside the bridge for tightening friction.
With bridge stabilization, frames regain proper placement keeping lenses aligned for clear optical vision.
Chapter 78 – How to Reshape Metal Eyeglass Frames
Metal eyewear can be gently tweaked to your proportions:
- Run glasses under warm tap water to make metal components malleable.
- While heated, use your fingers or needle nose pliers wrapped in cloth to make subtle bends at the nose bridge, earpieces, and temples until frames contour your face.
- Work slowly and repeatedly to test frame fit on the face, reheating as needed until achieving the perfect personalized shaping.
- Let frames fully cool before wearing them to set new shapes.
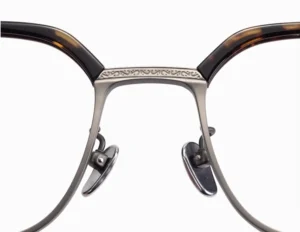
Reshaping distributes weight for all-day comfort. Take care not to over-bend metal pieces.
Chapter 79 – How to Determine Your Dominant Eye for Shooting Glasses
Follow these steps to determine your dominant eye for proper eye protection fit:
- Extend your arms straight forward, hands together making a small space between thumbs and forefingers.
- Focus on a distant object framed in the triangular opening you’ve created.
- Close your left eye. If the object remains centered, you are right-eye dominant.
- Close your right eye. If the object remains centered, you are left-eye dominant.
Your dominant eye should look through a protective shooting glasses lens for clearest vision while tracking moving objects.
Chapter 80 – How to Stop Eyeglasses From Rubbing Bridge of Nose
If your eyeglasses irritate the bridge of your nose:
- Ensure frames sit centered on your face so nose pads don’t shift weight unevenly.
- Try silicone nose pads for a softer, more comfortable feel versus hard plastics.
- Adjust pad arms closer together to lift frames off the nose bridge. A closer grip prevents rubbing.
- Carefully pinch and bend plastic frames inward at the bridge to reduce downward pressure.
- Use a hair dryer to reheat and reshape metal bridge pieces for a contoured not-flat fit across your nose profile.
- Lightly buff bridge interior with emery cloth to smooth any sharp spots irritating skin.
With these fit adjustments, glasses should rest easy without constant nose rubbing.
Chapter 81 – How to Replace Broken Eyeglass Frame Bridge
Bent or broken eyeglass bridges are repairable:
Plastic Frames
- Use clear epoxy to bond cracked sections after cleaning and lightly sanding parts. Clamp pieces together tightly until the adhesive sets fully.
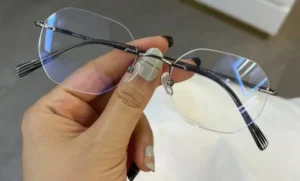
Metal Frames
- A jeweler can solder and reattach detached metal bridge pieces. Optical shops may offer free solder repairs.
Nose Pads Detached
- Clean contact areas then re-glue pads onto frames using thread locker gel for strong adhesion and screw hold.
For expedience, replacement clip-on bridge pieces are also available from optical shops to substitute for broken frames.
Chapter 82 – How to Measure Pupillary Distance for Glasses
Follow this method to accurately measure your pupillary distance (PD) for properly fit glasses:
- Look straight into a mirror from an arm’s length distance. Remove glasses.
- Use a millimeter ruler held vertically to mark the center of each pupil. Most are in the iris midpoint.
- Measure the distance between the two vertical pupil center marks. This is your PD measurement.
- Record PD for both far and near vision since spacing changes slightly.
- Repeat steps several times for averaging. Small movements can impact measurements.
Knowing your PD ensures glasses frames and lenses are positioned for optimal viewing.
Chapter 83 – How to Realign Lenses in Eyeglass Frames
Off-center lenses in frames cause visual distortion. To realign:
- Mark precise lens center points based on your pupillary distance measurements.
- Use a lensometer to mark the optical center of each lens corresponding to your Rx prescription.
- Compare markings – if lens centers don’t align with your pupil centers, they need realignment.
- Bring frames to an optician to reset lenses, carefully repositioning and mounting until aligned.
- Verify new positioning by comparing your pupil centers to lens optic centers.
Properly aligned lenses optimize your vision prescription performance.
Chapter 84 – How to Reshape Plastic Eyeglass Frames
To customize the fit of plastic eyeglasses:
- Hold frames near, not touching, a hairdryer to soften plastic.
- Once the plastic is malleable, use your fingers to gently bend and curve frames to match the contours of your face.
- Focus pressure on specific areas causing discomfort.
- Under hot running water, you can also heat then carefully bend frames for quick reshaping.
- Allow frames to fully cool and harden before wearing to set the new custom shape.
Go slowly and repeatedly test fit reshaping results until plastic frames feel comfortably contoured.
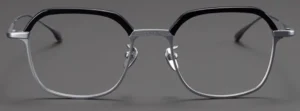
Chapter 85 – How to Fix Slipping Plastic Eyeglass Frames
To re-tighten loose plastic eyeglass frames:
Nose Bridge Adjustments
- Heat then pinch the bridge area inward for a better grip on the nose profile.
Bend Earpieces
- Angle earpieces inward slightly to increase tension steadying frames.
Replace Nose Pads
- Install new rubber nose pads with better friction to prevent sliding.
Tighten Joints
- Use needle nose pliers to compress joints then cool them so they retain a tighter fit.
Carefully tweaking the nose, ear, and hinge pieces in small increments will restore a comfortably snug plastic frame fit.
Chapter 86 – How to Clean Eyeglasses Properly
Keep lenses and frames looking their best by:
- Rinsing glasses under warm soapy water to remove dirt and oils.
- Gently rubbing lenses with a microfiber cloth using small circular motions.
- Rinsing again and drying thoroughly with a lint-free cloth.
- Allowing air drying and then polishing lenses with anti-static spray or solution.
- Storing glasses in a hard protective case when not wearing.
- Cleaning frames with eyeglass cleaner and lint-free wiping cloth.
- Avoiding harsh chemicals that can damage coatings and frames.
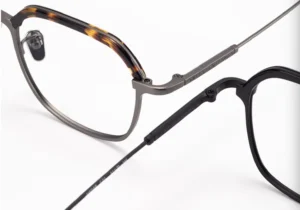
Proper cleaning removes vision-obstructing debris and prevents long-term scratch damage.
Chapter 87 – How to Fix Bent Eyeglass Frames
To repair crooked and warped eyeglasses:
- Inspect the shape on a flat surface. Identify specific bends.
- Heat metal frames under warm water then use padded pliers to slowly bend back into shape when malleable.
- For plastic frames, hold them near a hair dryer on low and gently flex them back into alignment as the plastic softens. Avoid overheating.
- Work in small increments, reheating frames and testing shape repeatedly until straight alignment is restored.
- Allow frames to fully cool and set before wearing.
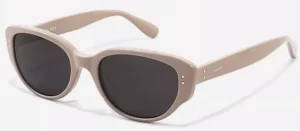
With care and patience, reshaping restores improperly bent frames. See an optician if vision problems persist.
Chapter 88 – How to Adjust Children’s Glasses For Good Fit
Keep kids’ eyeglasses fitting properly with these tips:
- Select flexible frames with soft, adjustable nose pads and bendable earpieces.
- Loosen nose pads and frame tension slightly for comfort on young faces.
- Frequently check frame alignment and screws – tighten loose parts promptly.
- Show children how to gently put on and remove glasses using two hands.
- Reshape frames over time as needed to fit growing facial features.
- Bring to annual eye exams for adjustments by an experienced optician.
Well-fitted kids’ glasses stay securely in place while withstanding active play.
Conclusion
Getting a perfect custom fit makes all the difference in maximizing visual clarity and wearing the comfort of prescription eyeglasses and sunglasses. With the techniques covered in this guide, you now have all the knowledge needed to properly measure frame dimensions for your facial proportions, incrementally adjust style and stability factors through bending and parts replacement, and even repair damaged frames in a pinch. Trust the process, go slowly with incremental tweaks, and test fit frequently until your frames feel like a natural physical extension rather than a foreign object on your face. Get ready to see and feel the difference customized adjustments make in your vision experience!
1 thought on “How to Adjust Glasses”
I eagerly started checking out this fantastic website a few days back with stunning content for their community. The site owner is gifted at informing readers. I’m impressed and hope they continue their wonderful service.